Espresso SchoolLearn the shot.
Better espresso, one shot at a time. Short lessons, real fixes, zero gatekeeping. Watch, swipe, try it at your machine, and start wherever you are.
- 12 lessons
- 9 short videos
- 30 min total
- Free
Your progress is saved on this device. Mark lessons done as you go.
Four tracks. Twelve short lessons.
Go in order for the full course, or jump to the lesson you need tonight. Each one takes about three minutes.
Watch
Every lesson opens with a short video: animated diagrams and real kit footage.
Swipe
A quick slide deck sums it up. Save it in your head for the next shot.
Try
Recipe builder, taste compass and a one-question check, right on the page.
Repeat
Tick lessons off as you go. Your progress stays on this device.
Start here
The basics: what espresso is, your first recipe, and the grinder.
Build a better puck
Prep that makes every shot even, and how to read it from below.
Dial it in
Taste, the science of extraction, and fresh beans.
Beyond the shot
Milk, the café menu, and caring for your gear.
What espresso really is
It isn't a bean or a roast. It's a way of brewing.
- Espresso is a brewing method: hot water pushed through finely ground coffee under pressure.
- Four words sum it up: small, fast, fine, pressure.
- Any coffee can be espresso. The label on the bag is a suggestion, not a rule.
- Small1–2 oz in the cup
- Fastabout 30 seconds
- Finefiner than table salt
- Pressurearound 9 bar
Espresso isn't a bean, a roast or a flavor. It's a way of brewing: a small, strong coffee made fast by pushing hot water through very fine grounds under serious pressure.
Keep readingShow less · 1 min
That pressure is what sets espresso apart from drip. A typical machine pushes water at around 9 bar, roughly 130 psi, or about nine times the air pressure around you. Water that would trickle through coffee by gravity is forced through a tightly packed puck in about half a minute, and it carries out oils and flavors a slow brew leaves behind.
What's crema?
The golden foam on top is a mix of coffee oils, water and gas escaping from fresh coffee. It's a freshness clue, not a score. Great crema doesn't guarantee a great shot, and older or darker beans make less of it.
Is espresso stronger?
Per sip, yes. Per drink, not really. A double shot has roughly as much caffeine as a regular cup of drip coffee. It's just packed into a couple of ounces.
SlidesThe lesson in slides
What makes a coffee “espresso”?
Got it? Tick it off. Your progress stays on this device.
Next: 02 · Your starting recipe →Your starting recipe
Two numbers run espresso: what goes in and what comes out.
- Weigh both. Start at 1:2: 18 g in, about 36 g out (16 g in, about 32 g out for a 51mm basket). Other basket? Pick it in the builder.
- Aim for 25–30 seconds, then let taste decide.
- Change one thing at a time.
Recipe builder
In
18 gOut
~36 gRatio
1:2.0Pull it in 25–30 seconds. Then taste, and change one thing at a time.
An espresso recipe is just two weights and a time. The dose is the dry coffee in your basket. The yield is the liquid espresso in your cup. The ratio between them sets the strength and flavor of the shot.
Keep readingShow less · 1 min
A great place to start is 1:2. With the double basket in our 54mm kits, that's 18 g of coffee in and about 36 g of espresso out. With the 51mm basket, start at 16 g in and about 32 g out. On another machine, the builder has starting doses for 58mm, 53mm and 49–50mm baskets, and for single baskets (about half the coffee of a double). Aim to finish in 25–30 seconds, counted from the moment you press brew.
Let the roast nudge you
Lighter roasts are harder to extract, so they often taste better with a longer ratio, around 1:2.5. Darker roasts give up flavor easily and shine a little shorter, around 1:1.5. Treat these as starting points, not rules.
Why a scale beats a shot glass
Crema makes volume lie: a shot can look like two ounces and weigh much less. Put your cup on a small kitchen scale and you'll repeat a good shot instead of guessing at it.
Tastes great but runs 22 seconds? Keep it. The timer is a guide; your taste is the judge.
SlidesThe lesson in slides
You dosed 18 g of coffee. Following 1:2, how much espresso should land in the cup?
Got it? Tick it off. Your progress stays on this device.
Next: 03 · Grind: your main dial →Grind: your main dial
Same coffee, same dose. The grind decides how it tastes.
- Finer grind = slower shot and more flavor pulled out. Coarser = faster and less.
- Fast and sour? Grind finer. Slow and bitter? Grind coarser.
- Move in small steps, and grind right before you brew.
Grind does two jobs at once. Smaller pieces give up their flavor faster, and they pack tighter, so water takes longer to get through. That's why the grinder is the most powerful dial you have.
Keep readingShow less · 1 min
Think sand versus gravel. Pour water over gravel and it races through. Pour it over sand and it slows down and soaks in. Espresso wants something like fine sand: finer than table salt, but not powder.
Reading the clock
If your shot gushes out in 15 seconds and tastes sharp or sour, the water didn't have time to pull enough flavor: grind finer. If it crawls past 35 seconds and tastes harsh or bitter, it pulled too much: grind coarser. Adjust in small steps and keep your dose the same while you dial in.
Fresh matters
Ground coffee loses aroma within minutes. That's why we grind right before every shot, straight into the portafilter.
SlidesThe lesson in slides
Your shot ran in 14 seconds and tastes sour. What's the first fix?
Got it? Tick it off. Your progress stays on this device.
Next: 04 · Puck prep: WDT →Puck prep: WDT
Your grinder makes clumps. Here's the 10-second fix.
- Clumps create dense and loose spots, and water rushes through the loose ones. That's channeling.
- Stir the grounds in small circles, bottom to top, for 10–15 seconds.
- Don't press down. You want a fluffy, even bed.
Almost every grinder makes small clumps. They look harmless, but inside the basket they create dense spots and loose spots. Under pressure, water takes the easiest path, so it rushes through the loose areas and skips the dense ones. That's channeling, and it can make one shot taste sour and bitter at the same time.
Keep readingShow less · 1 min
WDT (short for Weiss Distribution Technique, after the home barista who shared it) fixes that with a few thin needles. Stir the grounds in small circles through the full depth of the bed, from the bottom up, for 10–15 seconds. Hold the portafilter steady and keep the needles moving. Don't press down.
When you're done, the bed should look fluffy and even, with no dense spots. Give the portafilter a gentle tap to settle it, and you're ready to tamp.
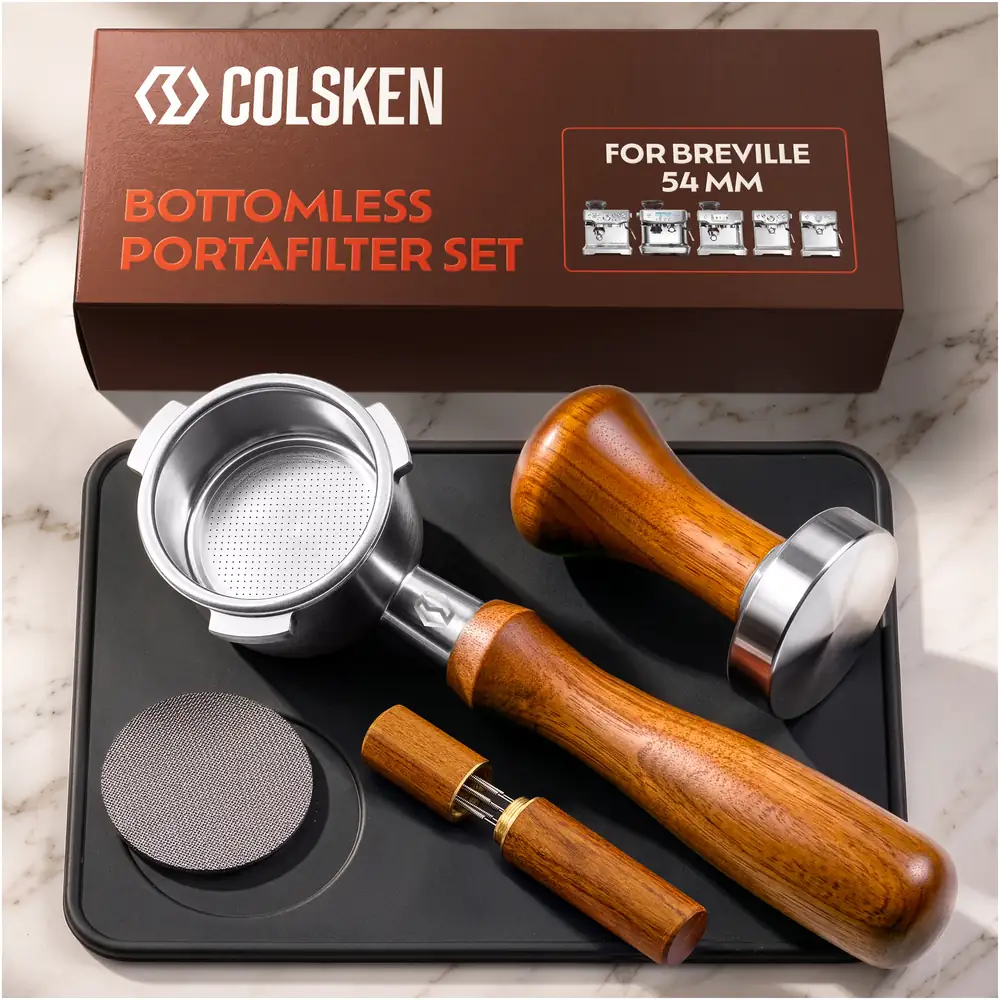
Every COLSKEN kit includes a fine-needle WDT tool. See the kits
SlidesThe lesson in slides
What's the goal of WDT?
Got it? Tick it off. Your progress stays on this device.
Next: 05 · Level, tamp & puck screen →Level, tamp & puck screen
Flat, level, consistent. Then let the screen spread the water.
- Tap once to settle, then press straight down until the coffee stops compressing.
- Level beats hard. Consistency beats force.
- A puck screen on top helps spread water and keeps your shower screen cleaner.
Once the bed is fluffy and even, a gentle tap or two on the mat lets it settle flat. A level bed means the same amount of coffee everywhere, so water can't find an easy path down one side.
Keep readingShow less · 1 min
Rest the portafilter on the mat, set the tamper flat on the coffee and press straight down, firmly, until the coffee stops compressing. Keep your wrist straight and your elbow above the tamper. There's no magic number of pounds: once the coffee is fully compressed, pressing harder changes very little.
A tilted tamp is a common hidden problem. One side of the puck ends up thinner, and the shot runs to that side first. A bottomless portafilter shows it right away.
The puck screen
Set the puck screen on top of the tamped coffee. It helps spread water across the puck and keeps your machine's shower screen cleaner. Rinse it after every session.
SlidesThe lesson in slides
Your shot always starts on one side. What's the most likely cause?
Got it? Tick it off. Your progress stays on this device.
Next: 06 · Read your shot from below →Read your shot from below
Flip it over and watch. Every pattern points to something you can fix.
- Good: drops appear evenly across the basket, then merge into one centered stream.
- Sprays, one side first or pale spots point back to prep.
- Fix prep first: WDT, level, tamp flat, puck screen.
This is where a bottomless portafilter pays off. With no spouts in the way, you see the underside of the basket, and the way the coffee comes through tells you how even your puck is.
Keep readingShow less · 1 min
Our kit's single-wall double basket (made for 18 g, or 16 g in the 51mm kit) has no hidden floor, so every pattern you see is your puck talking.
Don't chase a perfect-looking shot over a great-tasting one. A tiny spurt in a shot that tastes sweet and balanced isn't worth losing sleep over. Use what you see to choose your next change, and let taste have the final word.
Even & centered
SeeDrops all over, then one stream in the middle.
MeansAn even puck.
FixNothing. Repeat it.
Sprays or spurts
SeeThin jets shooting sideways.
MeansWater found a crack or loose spot.
FixWDT longer, level, tamp flat.
One side first
SeeCoffee appears on one side only.
MeansUneven bed or tilted tamp.
FixDistribute, then tamp level.
Early pale spots
SeeLight blond patches early on.
MeansThin areas running too fast.
FixDose to your basket, break clumps.
Gushing
SeeFast, pale flow in seconds.
MeansToo coarse or too little coffee.
FixGrind finer or dose up a little.
SlidesThe lesson in slides
You see thin sprays shooting sideways. What do you fix first?
Got it? Tick it off. Your progress stays on this device.
Next: 07 · Taste & fix →Taste & fix
Sour, bitter, weak or strong: one tap tells you what to change.
Taste compass
How did your shot taste? Tap one.
Sour, bitter, weak or strong. Each one points to a single change.
- Sour means the water pulled too little: grind finer.
- Bitter means it pulled too much: grind coarser.
- Weak or strong is about the ratio: stop sooner or run longer.
Your tongue is the best tool you own. Most off shots point in one of four directions, and each has one simple fix.
Keep readingShow less · 1 min
Sour
Sharp and puckery, and the taste disappears fast. The water didn't get enough out of the coffee. Grind finer.
Bitter
Harsh and dry, and it lingers. The water pulled too much. Grind coarser.
Weak
Thin and watery. Stop the shot a little sooner. Weak and sour? Grind finer too.
Strong
Heavy and intense. Let it run a little longer. Strong and bitter? Grind coarser too.
Can't tell sour from bitter? Focus on the finish: sour disappears, bitter hangs around.
SlidesThe lesson in slides
A shot tastes harsh and the dryness lingers. What do you change?
Got it? Tick it off. Your progress stays on this device.
Next: 08 · Why it works: three acts →Why it works: three acts
Acids first, sweetness in the middle, bitterness last.
- Flavors leave the coffee in order: bright acids, then sweetness, then bitterness.
- Stop too early and it's sour. Run too long and it's bitter.
- Dialing in is catching all three in balance.
Your shot comes out in three acts. Bright acids dissolve first, sweetness and body follow, and bitter compounds arrive last. A balanced shot captures plenty of the first two and only a touch of the third.
Keep readingShow less · 1 min
That's why the same coffee can taste sour or bitter depending on how far you let it run, and why grind and ratio matter so much. A finer grind or a longer ratio pulls further into the sweet and bitter acts. A coarser grind or a shorter ratio stops earlier.
Try it at home: the three-cup test
Pull one shot into three small cups, switching cups every 10 seconds or so. Taste them side by side. The first is intense and tangy, the middle is sweet and round, the last is thin and bitter. Once you've tasted that, sour and bitter won't confuse you again.
SlidesThe lesson in slides
Which flavors come out of the coffee first?
Got it? Tick it off. Your progress stays on this device.
Next: 09 · Beans & freshness →Beans & freshness
Your beans have a birthday. Read it.
- Read the roast date, not the best-by date.
- Give beans a few days to rest. The sweet spot is roughly 1–4 weeks after roasting.
- Store them airtight, cool and dark. Freeze only sealed portions.
Coffee is a fresh food. The date that matters is the roast date printed on the bag, not a best-by date a year away.
Keep readingShow less · 1 min
Too fresh is a thing, too. Newly roasted beans are still releasing gas, which pushes water away and makes shots uneven and foamy. Most beans settle after a few days and taste their best for roughly one to four weeks after roasting, depending on the roast.
Choosing beans
Medium roasts are the friendliest place to start. Light roasts are brighter and like longer pulls; dark roasts are bolder and like shorter ones. Oily beans aren't fresher, just darker.
Storing beans
Keep beans in an airtight container somewhere cool and dark, and put only a few days' worth in the grinder at a time. If you freeze beans, freeze sealed portions and let each one come to room temperature before opening, so no moisture settles on the beans.
SlidesThe lesson in slides
Which date on the bag matters most?
Got it? Tick it off. Your progress stays on this device.
Next: 10 · Steam milk by ear →Steam milk by ear
Air early, spin late, stop at warm.
- Air: tip just under the surface for the first few seconds. Listen for a soft “tss.”
- Spin: sink the tip a little and let the milk whirl until the pitcher is hot to hold, about 140°F.
- Tap, swirl and pour while it's glossy, like wet paint.
Great milk is about sound and feel, not gadgets. Start with cold milk in a cold pitcher, filled to just below where the spout begins.
Keep readingShow less · 1 min
1 · Air
Purge the steam wand, place the tip just under the surface and open the steam. For the first few seconds you should hear a soft, steady “tss,” like paper tearing gently. That's air folding in. Big bubbles mean the tip is too high; a loud screech means it's too deep.
2 · Spin
Once the milk has grown by about a third, raise the pitcher a little so the tip sinks and the milk starts to whirl. The sound turns into a quiet hum. The spin breaks big bubbles into tiny ones for silky microfoam.
3 · Stop
Stop when the pitcher is hot to hold, about 140°F. Hotter milk tastes flat and loses its sweetness. Wipe and purge the wand, tap the pitcher to pop any big bubbles, and swirl until the milk looks glossy, like wet paint.
Which milk?
Whole milk foams easiest and tastes sweetest. For plant-based milk, a barista-style oat milk is the closest match.
SlidesThe lesson in slides
When do you add air to the milk?
Got it? Tick it off. Your progress stays on this device.
Next: 11 · The café menu, decoded →Water & care
Clean gear and good water make better shots.
- After every shot: knock out the puck, wipe the basket, run a short flush.
- Rinse the puck screen and dry wooden handles right away.
- Use water that tastes good. Filtered is great; skip distilled.
Every shot
- Knock out the puck
- Wipe the basket dry
- Run a 2-second flush
- Purge the steam wand
Every day you brew
- Rinse the puck screen
- Rinse the basket and portafilter
- Dry wooden handles right away
- Wipe the group gasket
Weekly
- Soak the metal basket and screen in espresso cleaner
- Brush out the grinder
- Wipe coffee oils from the hopper
On your machine’s schedule
- Descale as the manual says
- Backflush only if your manual allows it
Espresso is about 98% water, so the water you use matters. If it tastes good on its own, you're set, and filtered water is great. Skip distilled: coffee needs some minerals to taste right, and so does your machine.
Keep readingShow less · 1 min
Old coffee oils turn stale and bitter, and they build up fast. The good news: a bottomless portafilter has no spouts, so there are fewer corners for old coffee to hide in.
Hand wash the portafilter, basket, puck screen and tools in warm water, and dry wooden handles right away. Keep wooden parts out of the dishwasher and out of cleaner soaks.
Backflush and descale only on the schedule in your machine's manual. Not every machine can backflush.
SlidesThe lesson in slides
What's the best water for espresso?
Got it? Tick it off. Your progress stays on this device.
Next: your toolbox →Keep these by your machine.
The dial-in log
Write down every shot for a week and you'll learn your coffee twice as fast. One change per row.
Download the log (PDF)Glossary
- Basket
- The metal cup in the portafilter that holds the coffee. Home machines use sizes from about 49mm to 58mm, and a single basket holds about half as much as a double. Ours is a single-wall double basket.
- Bottomless portafilter
- A portafilter with no spouts or floor under the basket, so you can watch the shot form.
- Channeling
- When water finds an easy path through the puck and rushes through it, skipping the rest.
- Crema
- The golden foam on a fresh shot: coffee oils, water and escaping gas.
- Dial in
- Adjusting grind, dose and yield until a coffee tastes its best.
- Dose
- The weight of dry coffee in the basket.
- Dosing ring
- A collar that sits on the basket to keep grounds from spilling while you grind and stir.
- Extraction
- Dissolving flavor out of coffee grounds into water.
- Fines
- The tiniest particles a grinder makes. A few help body; too many slow the shot.
- Group head
- The part of the machine where the portafilter locks in and water comes out.
- Microfoam
- Steamed milk with bubbles so small it looks glossy and pours like paint.
- Pre-infusion
- Wetting the puck gently before full pressure. Some machines do it automatically.
- Pressurized basket
- A basket with a second wall and one tiny exit hole that fakes pressure. Ours is not pressurized.
- Puck
- The compressed bed of coffee in the basket.
- Puck screen
- A thin metal disc on top of the puck that spreads water and keeps the shower screen clean.
- Ratio
- Yield divided by dose. 18 g in and 36 g out is 1:2.
- Ristretto
- A short, concentrated shot, around 1:1 to 1:1.5.
- Lungo
- A long shot, around 1:3 or more.
- Roast date
- The day the beans were roasted. The best freshness clue on the bag.
- Shower screen
- The perforated plate in the group head that spreads water over the coffee.
- Single-wall basket
- A regular basket with many holes, so the puck itself creates the pressure.
- Tamp
- Pressing the grounds into a flat, firm puck.
- WDT
- Weiss Distribution Technique: stirring grounds with thin needles to break up clumps.
- Yield
- The weight of liquid espresso in the cup.
Espresso School FAQ
Do I really need a scale?
It's the single best upgrade for consistency. Any small kitchen scale that reads in 0.1 g steps works. Without one, you're guessing at both numbers that run espresso.
Why does my shot spray?
Water found a weak spot in the puck. Break up clumps with the WDT tool, settle the bed with a gentle tap, tamp level and use the puck screen. See lessons 04–06.
Which basket comes in a COLSKEN kit?
A regular single-wall double basket. It's made for about 18 g in the 54mm kits and about 16 g in the 51mm kit.
Will these lessons work with a pressurized basket?
Mostly, yes, but a pressurized basket evens out the flow for you, so the patterns you see from below won't tell you much. A single-wall basket shows everything.
How hard should I tamp?
Firm enough that the coffee stops compressing. Level and consistent matters far more than force.
How long do beans stay fresh?
Most taste best roughly 1–4 weeks after the roast date, after a few days of rest.
Do I need to WDT every shot?
If your grinder makes clumps, yes. It takes 10–15 seconds and makes shots more even and more repeatable.
Now go pull a shot.
Put it all together with the step-by-step brew guide, then come back whenever a shot surprises you.